Your baseball glove is like a trusty teammate, always there to help you catch that winning play. Taking care of it is key to making sure it stays in the game with you. In this guide, we’ll talk about why it’s crucial to keep your glove in top shape and how doing it yourself can save you some hard-earned cash.
Let’s face it, professional repairs can cost a lot. But fear not, we’re here to show you that DIY Baseball Glove Maintenance Simple Repairs are not only easy but also easy on your wallet. So, grab your glove, and let’s get down to business because a well-maintained glove is your ticket to many more victories on the field!
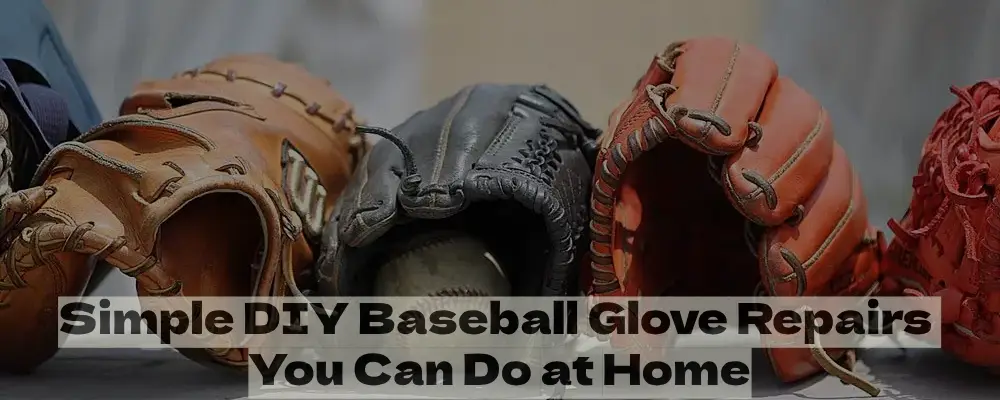
Baseball Glove Maintenance Simple Repairs
I. Common Issues with Baseball Gloves
Baseball gloves go through wear and tear, causing common problems for players. Let’s discuss the issues and simple solutions:
A. Broken Laces
Baseball players often encounter the problem of broken laces in their gloves. When the laces break, it affects the overall performance of the glove, making it less reliable during play.
- Sometimes, the laces that hold your glove together snap or wear out.
- To fix this, carefully remove the damaged lace using pliers.
- Measure and cut a new lace, then thread it through the glove’s holes.
B. Worn-out Leather
Over time, the leather on your baseball glove may start to wear out. This is especially common in areas that face a lot of friction and use. Worn-out leather can result in decreased durability and impact the glove’s ability to catch and hold onto the ball securely.
- Over time, the leather on your glove can get worn and lose its grip.
- Clean the glove with a damp cloth to remove dirt and grime.
- Apply a good-quality leather conditioner to bring back its freshness.
C. Loose or Missing Stitches
Another issue players commonly face is loose or missing stitches in their gloves. Stitches play a crucial role in holding the different parts of the glove together. When they become loose or go missing, the structural integrity of the glove is compromised, impacting its performance on the field.
- Stitches can loosen or come undone, affecting the glove’s durability.
- Identify areas with loose stitches and use needle-nose pliers to tighten or replace them.
- Ensure all stitches are secure to maintain the glove’s integrity.
Understanding and addressing these common problems is essential for maintaining the quality and functionality of your baseball glove. Now, let’s explore the practical steps you can take to fix these issues and keep your glove in top shape for the game.
II. Essential Tools and Materials
A. Basic Tools Needed for Glove Maintenance
Leather Conditioner
To keep your baseball glove in top-notch condition, you’ll need a leather conditioner. It’s like lotion for your glove, making the leather soft and preventing it from drying out or cracking over time.
- Apply leather conditioner regularly to keep the glove’s leather flexible and resilient.
- Helps prevent stiffness and maintains the glove’s overall quality.
- Especially important for older gloves or those exposed to harsh weather conditions.
Lacing Kit
A lacing kit is your go-to for fixing broken or worn-out laces on your baseball glove. Think of it as your glove’s repair kit, allowing you to replace damaged laces and extend the life of your trusty equipment.
- Use the lacing kit to replace broken or frayed laces, ensuring a secure and tight fit.
- Helps maintain the shape of the glove and ensures proper functioning during gameplay.
- Essential for addressing issues like loose webs or finger stalls.
Needle-Nose Pliers
Needle-nose pliers are the superheroes of glove maintenance. These slim, pointy tools can fix loose stitches in a jiffy, ensuring your glove stays intact and performs at its best. They’re like the stitch doctors for your baseball companion.
- Perfect for tightening loose stitches without damaging the surrounding material.
- Helps secure critical areas like the pocket and webbing.
- Ideal for minor repairs that can save you from buying a new glove.
B. Purpose of Each Tool
Leather Conditioner
Leather conditioner is your glove’s best friend. It moisturizes the leather, keeping it supple and ready for action. Just as sunscreen protects your skin, this conditioner shields your glove from the elements, ensuring it’s always game-ready.
- Prevents leather from drying out, cracking, or becoming stiff.
- Enhances the glove’s durability, extending its lifespan.
- Creates a protective barrier against dirt, moisture, and other environmental factors.
Lacing Kit
Your lacing kit is the handyman for your glove. It allows you to replace damaged laces, holding everything together seamlessly. Whether it’s a snapped lace or general wear and tear, this kit ensures your glove remains a reliable partner on the field.
- Provides a quick and effective solution for broken or frayed laces.
- Maintains the structural integrity of the glove.
- Easy to use, even for beginners, with step-by-step instructions included.
Needle-Nose Pliers
Needle-nose pliers are your glove’s stitch saviors. They delicately handle loose stitches, ensuring your glove stays in top-notch condition. It’s like having a personal tailor for your baseball glove, making those minor repairs that keep it performing like new.
- Enables precise tightening or replacement of loose stitches.
- Safely secures essential parts of the glove, preventing further damage.
- Compact and easy to maneuver for detailed repairs on the go.
III. Step-by-Step Repairs
A. Broken Laces
If your baseball glove’s laces are giving up, don’t worry. Fixing them is easy! Follow these simple steps to make your glove good as new. Fixing it is as easy as 1-2-3.
Remove the damaged lace:
- Gently untie and take out the worn-out lace.
- Avoid pulling too hard to prevent further damage.
Measure and cut the replacement lace:
- Use a ruler to get the right length.
- Trim the new lace with scissors for a precise fit.
Thread the new lace through the glove:
- Start from the bottom, weaving through the holes.
- Secure with a knot at the end.
B. Worn-out Leather
Is your glove’s leather feeling a bit tired? Revive it with these straightforward steps. Your favorite glove will thank you!
Clean the glove with a damp cloth:
- Dab a cloth in water, gently wipe away dirt.
- Ensure it’s damp, not soaking wet.
Apply leather conditioner to rejuvenate the material:
- Use a small amount, rubbing it evenly.
- Let it absorb for a day before use.
C. Loose or Missing Stitches
Loose stitches? No problem! Fix them up with these easy steps. Grab some needle-nose pliers, and let’s get your glove back in the game.
Identify the areas with loose stitches:
- Inspect your glove, locate any loose threads.
- Focus on areas where the stitching is loose or missing.
Use needle-nose pliers to tighten or replace stitches:
- Carefully pull and tighten loose stitches.
- For missing stitches, use the pliers to weave new ones.
A well-cared-for glove can make a big difference on the field. Keep your gear in top shape with these simple DIY repairs!
IV. Maintenance Tips
To make your baseball glove last longer, follow these simple tips:
Store the glove properly:
Keep your glove in a cool, dry place. Avoid leaving it in direct sunlight or damp areas, as this can damage the leather.
- Always keep your glove in a cool and dry place.
- Avoid leaving it in direct sunlight, as it can damage the leather.
- Use a glove bag or wrap it in a cloth for extra protection.
Keep it clean and dry:
Cleaning your glove regularly ensures it stays in top condition. Here’s how:
- Wipe off dirt and debris with a damp cloth after each use.
- Avoid using harsh chemicals; a mild soap solution works well for stubborn stains.
- Dry the glove naturally; never use heat sources like a hairdryer.
Regularly check for wear and tear:
Catching issues early prevents bigger problems later. Take a few minutes to inspect your glove:
- Inspect your glove for loose stitches or damaged laces.
- Address any issues promptly to prevent further damage.
- Apply leather conditioner periodically to keep the material in good condition.
By following these simple steps, you’ll keep your baseball glove in great shape, ready for every game.
Summary
In conclusion, taking the time to perform DIY maintenance on your baseball glove is a simple yet crucial investment in your gear and performance. By addressing common issues such as broken laces, worn out leather, and loose stitches, you not only extend the life of your glove but also enhance its effectiveness on the field. This proactive approach not only saves you money on frequent replacements but also ensures that your glove remains a reliable partner in your baseball journey.
DIY glove care is more than a practical choice; it’s a commitment to your game. So, encourage yourself and fellow players to adopt these straightforward repair techniques. With a little effort and the right tools, you can keep your glove in top-notch condition, allowing you to focus on what truly matters playing your best game.
FAQs
Q: Can I use household items for glove maintenance?
While basic cleaning can be done with household items, it’s recommended to invest in specialized products like leather conditioner for effective maintenance.
Q: What do I do if my glove’s laces break during a game?
Keep a spare lace in your bag and follow our step-by-step guide in the blog to replace it on the spot.
Q: Can I repair major tears in the leather myself?
For significant damage, it’s advisable to seek professional assistance. DIY repairs are most effective for minor issues like loose stitches or small tears.
Q: How can I prevent my glove from getting too stiff after conditioning?
Use a minimal amount of leather conditioner, and ensure you evenly distribute it. Wipe off any excess to maintain flexibility.