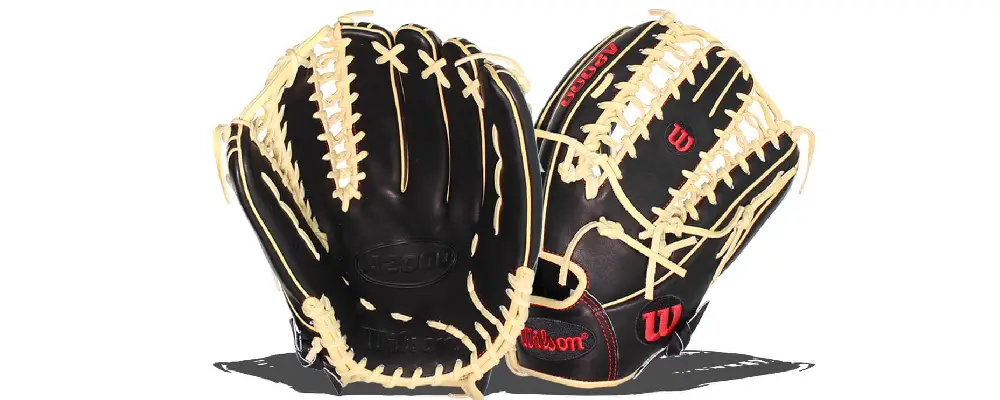
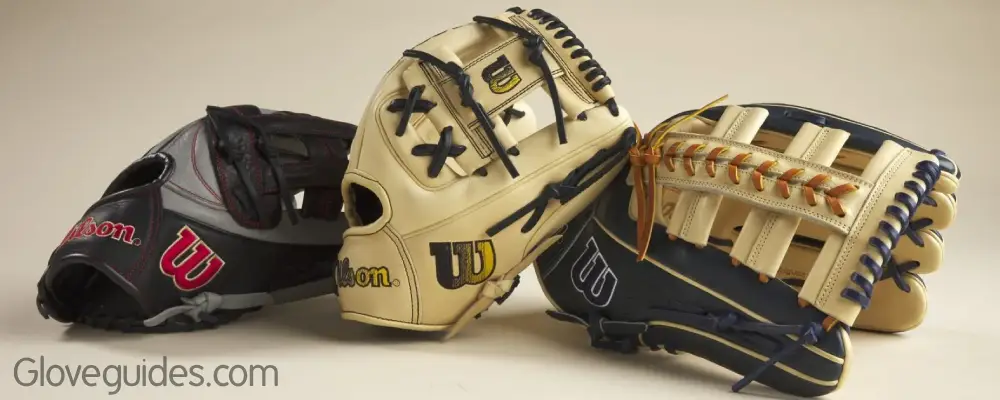
Baseball gloves are like trusty companions on the field, molding to your hand and becoming an extension of your instincts. But unlike a loyal dog, a brand new glove arrives stiff and unfamiliar. Enter the art of breaking in: a process of transforming that leather shell into a snug, reliable partner. It’s like finding the perfect pair of shoes for your game. It takes a bit of breaking in, but the reward is a comfortable, confident extension of yourself on the field.
Ever wondered, “How to Break in a Baseball Glove?” Well, worry not! This guide will explore simple, hands-on techniques to mold your glove to perfection. Say goodbye to that stiff feeling and hello to a glove that feels like an extension of your hand. Let’s jump into the world of glove customization and make your baseball experience a comfortable and enjoyable one!
The Importance of Breaking in a Baseball Glove!
Think of a baseball glove as a blank canvas. By breaking it in, you’re painting your own masterpiece, molding the leather to fit your hand and playing style. This personalized fit brings a multitude of benefits:
Why is Breaking in a Glove Essential for Players? From Rookies to All-stars:
A brand new glove might look impressive, but its rigidity hinders your game. A broken-in glove, on the other hand, is a game-changer. It reacts with your movements, closes effortlessly around the ball, and forms a deep, welcoming pocket that cradles throws like a velvet cushion. The benefits are clear:
- Comfort: A well-broken-in glove feels like an extension of your hand, eliminating awkwardness and fatigue.
- Control: A glove that conforms to your hand shape allows for better grip and ball manipulation, leading to more confident catches.
- Performance: A smooth, flexible pocket cradles the ball securely, minimizing fumbles and maximizing your defensive prowess.
- Durability: Proper break-in strengthens the leather, making your glove last longer and withstand the rigors of the game.
Choosing the Right Glove:
Before you delve into the satisfying process of transforming your brand new glove into a loyal extension of your hand, a crucial foundation must be laid – choosing the right glove. It’s like finding the perfect puzzle piece: get the fit wrong, and the picture won’t quite come together.
i. Selecting the Appropriate Glove Size:
It all starts with finding the right fit. A glove too big will be clunky and hinder your agility, while one too small will restrict your hand and cause discomfort. Here’s a general size guide based on age and hand size:
- Youth (7-12 years): 10.5″ – 11.5″
- Teenagers (13-18 years): 11.5″ – 12.5″
- Adults: 12.5″ – 13.5″
Remember, these are just starting points. Always try on the glove before purchasing to ensure a snug but comfortable fit. You should be able to flex your fingers easily and close the glove with minimal effort.
ii. Considering the Player’s Position:
Different positions require different gloves. Here’s a quick rundown:
- Infielders: Smaller gloves (11″ – 12.5″) with shallow pockets for quick transfers and throws.
- Outfielders: Larger gloves (12.5″ – 13.5″) with deeper pockets for catching fly balls and long throws.
- Catchers: Specialized mitts with thick padding to handle the sting of fastballs.
iii. Quality of the Glove Material:
The type of leather used in the glove plays a significant role in its durability, feel, and break-in time. Here are the main types:
- Full-grain leather: Top-of-the-line, offers exceptional durability and a natural feel, but requires longer break-in.
- Top-grain leather: A good balance of quality and affordability, breaks in faster than full-grain leather.
- Synthetic leather: Affordable and easy to maintain, but may not offer the same level of durability or feel as real leather.
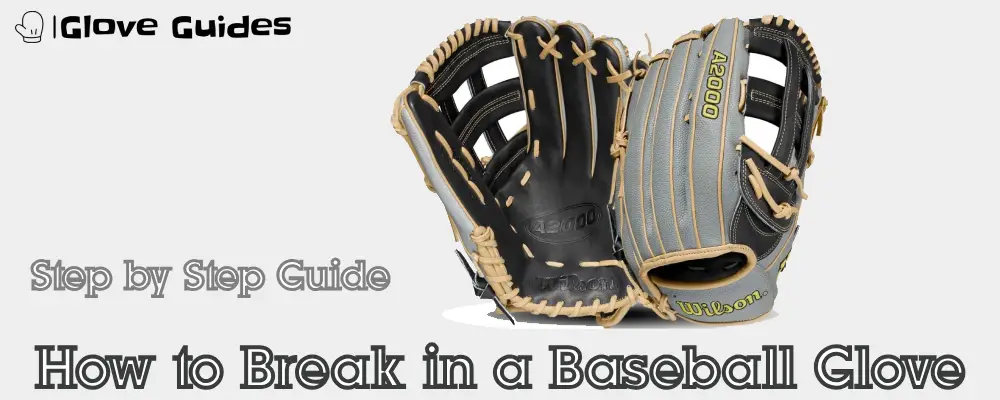
How to Break in a Baseball Glove?
Here’s a step by step guide on breaking in your baseball glove:
1. Breaking in Catcher’s Mitts and First Base Gloves
While the general principles of breaking in a baseball glove apply to all positions, catcher’s mitts and first base gloves require some specific considerations due to their unique shapes and functions. Here’s a breakdown of how to tailor your approach for these specialized gloves:
I. Breaking In a Catcher’s Mitt:
- Focus on the Web: The large web is a crucial element of a catcher’s mitt. Use a mallet or weighted ball to gently pound the web area, shaping it to cradle throws of varying angles.
- Deepen the Pocket: The pocket on a catcher’s mitt needs extra depth to handle high fastballs and pitches bouncing in the dirt. Stuff a rolled-up sock or small baseball in the pocket and pound the area behind it to create a deep, secure space.
- Condition the Padding: The thick padding on a catcher’s mitt can be particularly stiff. Apply a leather conditioner sparingly to soften it up and improve flexibility for blocking pitches.
- Mind the Thumb: The thumb area on a catcher’s mitt takes a lot of stress. Break it in by repeatedly opening and closing the mitt, focusing on loosening the leather around the thumb joint.
II. Breaking In a First Base Glove:
The different parts of a glove should be in focused while breaking in
- Shape the Pocket: A first baseman’s mitt needs a wide, deep pocket to scoop throws from across the diamond. Use a mallet or weighted ball to pound the lower area of the pocket, creating a secure landing pad for throws.
- Loosen the Fingers: First base gloves often have stiff fingers for better control. Gently bend and flex the fingers individually to loosen them up without compromising their ability to grip the ball securely.
- Work the Heel: The heel of a first baseman’s mitt can be quite rigid. Pound the heel area with a mallet to make it more flexible and allow for easier glove closure.
- Strengthen the Web: The web on a first baseman’s mitt can be used to snag errant throws. Gently massage the webbing to loosen it up and improve its ability to snag tipped balls.
III. Additional Tips for Both Mitts:
- Play Specific Drills: Engage in fielding drills designed for your position to work on specific techniques and mold the glove accordingly.
- Use Ball-Specific Methods: For catchers, consider using a weighted baseball to simulate the impact of fastballs on the mitt. First basemen can practice scooping grounders with baseballs placed at different angles.
- Listen to Your Glove: Pay attention to which areas feel stiff or uncomfortable and adjust your break-in techniques accordingly.
2. How to Break in?
Step I: Warm Up the Leather (Optional):
- Safety First: Avoid scorching water! Opt for lukewarm, not exceeding 100°F (38°C).
- Gentle Touch: Dip a clean towel in the warm water, wring it out thoroughly, and lightly dab the pocket and palm of the glove. Don’t saturate it!
- Rest & Repeat: Leave the glove to air dry naturally for at least 30 minutes before proceeding. Repeat this process once or twice, if desired.
Step II: Position for Shaping:
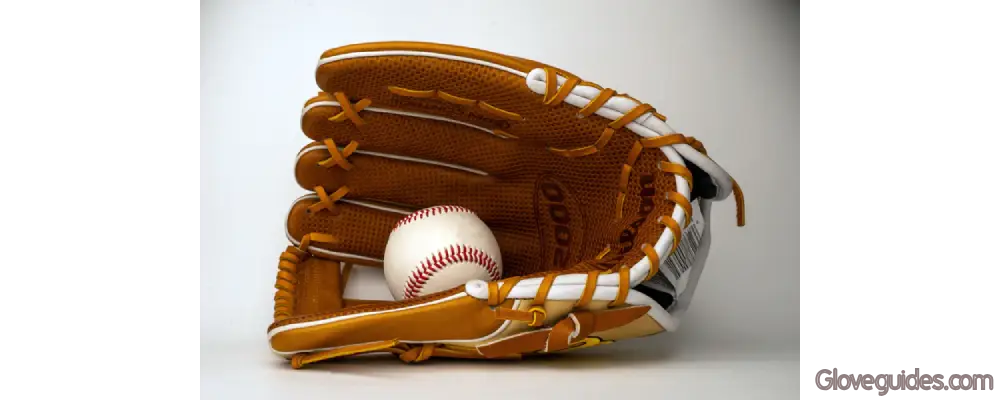
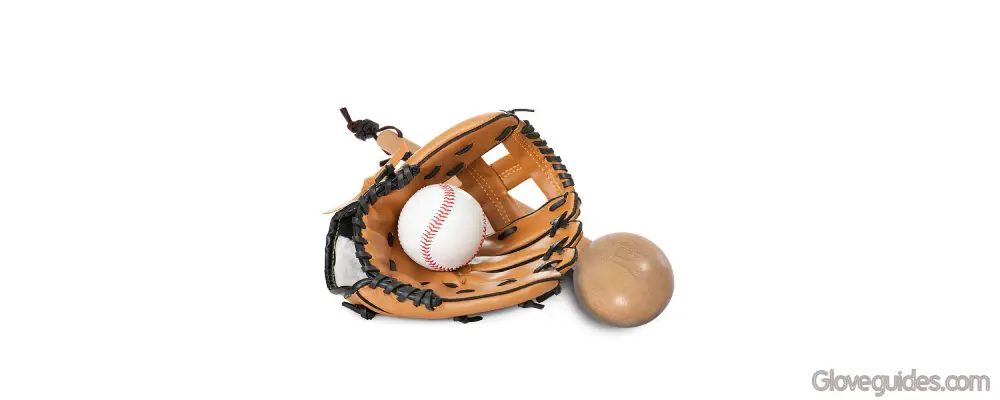
- Secure Hold: Close the glove snugly, aligning the pinky finger and thumb. Use a baseball or a tightly rolled-up sock for the pocket and secure it with elastic bands or sturdy yarn.
- Variety is Key: Experiment with different ball sizes and positions within the pocket to create your desired depth and feel.
Step III: Stretch the Stiffness Away:
- Slow & Steady: Hold the glove by the pinky and thumb base. Gently pull it open and closed, gradually increasing the range of motion over time.
- Target the Tight Spots: Pay special attention to areas like the palm, heel, and fingers, where stiffness often lingers.
- Multi-Directional: Don’t just focus on opening and closing. Gently twist and flex the glove in different directions for a more even break-in.
Step IV: Craft the Perfect Pocket:
- Tool Time: Choose a glove mallet specifically designed for leather shaping. In a pinch, use a rolled-up magazine wrapped in a towel for added padding.
- Precise Pounding: Gently tap the area where the ball meets the pocket, focusing on creating a deep, cupped shape. Aim for 10-15 taps at a time, with breaks in between to avoid overworking the leather.
- Shape & Test: After each round of pounding, check the pocket’s depth and feel by inserting a ball. Repeat until you’re satisfied with the shape and softness.
Step V: Pound for Suppleness:
- Back Support: Lay the glove flat with the thumb side facing up. Place the mallet (or rolled-up magazine) slightly above the base of the thumb and gently pound downwards.
- Controlled Force: Use moderate pressure and focus on loosening the leather without damaging it. Aim for 5-10 taps at a time, taking breaks as needed.
- Flexibility Check: Test the glove’s flexibility by opening and closing it. You should notice a decrease in stiffness and an increase in range of motion.
Step VI: Loosen the Web’s Grip:
- Lacing Freedom: Gently loosen the laces at the top of the web, starting with the ones closest to the fingers. Avoid over-loosening, as you still want some support for catching.
- Natural Flex: Test the web’s movement by holding the glove open and gently flexing it side-to-side. Aim for a slight give without compromising overall structure.
Step VII: Start Ramping It Up:
As your glove starts to loosen up from natural methods like playing catch and practice, you can consider gradually introducing more intense techniques to further accelerate the break-in process. Here are an option:
- Weighted Ball: Using a weighted ball during practice adds stress to the pocket and palm, speeding up their break-in. Start with lighter weights and gradually increase as the leather loosens.
Caution: Remember, moderation is key! Ramping up too quickly can damage the leather. Listen to your glove and adjust your intensity accordingly.
Step VIII: Glove Wrapping:
Wrapping the glove tightly with rubber bands or string around a baseball can help maintain its desired shape while it breaks in. This can be particularly helpful for creating a deep pocket. However:
- Don’t over-tighten: Excessive pressure can damage the leather or distort its natural shape. Wrap snugly but not forcefully.
- Regularly check and adjust: Monitor the glove during the wrapping process and adjust the tightness or position as needed.
3. Other Tools and Methods
While traditional methods like playing catch and using a mallet are tried-and-true, there’s a world of alternative tools and techniques waiting to be explored when it comes to breaking in your baseball glove. Here’s a deeper dive into some unconventional options:
I. Break-in Ball:
This weighted ball, often filled with sand or beads, takes the place of a baseball during the shaping process. The added weight helps loosen the leather in the pocket and palm, creating a deeper, more accommodating shape. Remember, use it in conjunction with regular catch practice for best results.
II. Glove-Breaking Machine:
For those seeking a faster and more controlled approach, professional glove-breaking machines offer a unique option. These machines mimic the action of catching, flexing and compressing the glove in specific patterns to achieve a desired level of break-in. While convenient, they come with a cost and may not be readily available in all locations.
III. Sunlight Exposure:
The sun’s gentle warmth can be a natural ally in softening leather. Place your glove in indirect sunlight for short periods, but be cautious! Excessive exposure can dry out and damage the material. Remember, shade is your friend, and never leave your glove in direct sunlight for extended periods.
IV. Shaving Cream:
This surprising trick involves applying a small amount of shaving cream to the pocket and palm. The cream’s softening properties can help loosen the leather, but use it sparingly and rinse it off thoroughly afterwards. Overusing shaving cream can be detrimental and affect the glove’s grip.
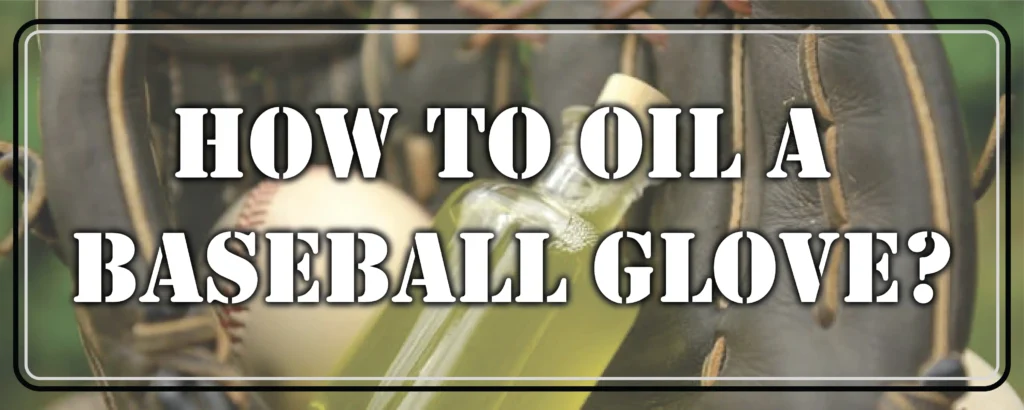
V. Oil or Conditioner:
While not as common as other methods, some players swear by applying a light coat of natural oil or leather conditioner to their gloves. Choose a product specifically designed for baseball gloves and follow the manufacturer’s instructions carefully. Over-oiling can make the leather soft and slippery, impacting your control.
4. Mallet and Ball: Precision Tools for Glove-Breaking
While traditional methods like playing catch hold immense value, a glove mallet and break-in ball offer targeted shaping power. Using these tools correctly can significantly speed up the process and create a glove that feels like an extension of your hand. Let’s explore the secrets to using these tools effectively, targeting the right areas for maximum impact.
i. Proper Areas to Target:
- Pocket: This is the heart of the glove, where the ball needs to nestle comfortably. Gently pound the area where the ball meets the pocket, focusing on creating a deep, cupped shape.
- Palm: The palm needs to be flexible for absorbing impact and securing throws. Pound the back of the palm from the pinky to the thumb, working your way from the top down.
- Heel: The heel provides support and stability. Target the area between the palm and the pinky with light, controlled mallet strikes.
- Web: Leaving the web too stiff can lead to missed catches. Gently pound the base of the web fingers to loosen them up slightly.
ii. Techniques for Effective Breaking In:
- Mallet Power: Use a glove mallet specifically designed for leather. Start with light taps and gradually increase force as the leather softens. Avoid brute force, as it can damage the stitching or crack the leather.
- Ball Play: A seasoned baseball is ideal, but a tightly rolled sock works in a pinch. Place it in the pocket and close the glove, then use the mallet to gently pound the targeted areas around it.
- Directional Focus: Don’t just pound straight down. Vary the direction of your strokes to create a well-rounded, natural feel in the glove.
- Heat it Up: Warming the leather slightly with warm water or indirect sunlight can make it more pliable and receptive to shaping. Just don’t overdo it!
- Consistency is Key: Regular, short sessions are better than occasional bursts of intense pounding. Break-in takes time, so be patient and enjoy the process of molding your glove to your hand.
5. Natural Methods:
While traditional methods like playing catch and using a mallet are tried-and-true, there’s a world of alternative tools and techniques waiting to be explored when it comes to breaking in your baseball glove. Here’s a deeper dive into some unconventional options, along with two essential natural methods:
i. Regular Use During Practice:
This might seem obvious, but you’d be surprised how often it’s overlooked. The more you use your glove, the faster it breaks in. Every throw, catch, and ground ball helps soften the leather and mold it to your hand. Integrate your new glove into your regular practice routine, whether it’s fielding drills, hitting sessions, or simply throwing against a wall. The more time you spend with it, the quicker it becomes an extension of yourself.
Benefits:
- Gradual and controlled break-in: Regular use allows the leather to soften naturally, preventing any damage from aggressive techniques.
- Develops muscle memory: As your glove conforms to your hand, you’ll develop a deeper understanding of its movement and reaction, leading to smoother fielding and improved control.
- Builds a bond: The more you use your glove, the more attached you become to it. This emotional connection can translate into a boost of confidence and performance on the field.
Tips:
- Start slow and gradually increase the intensity of your practice sessions as the glove loosens up.
- Focus on different aspects of fielding, like ground balls, fly balls, and backhands, to ensure all areas of the glove get worked out.
- Don’t be afraid to get creative! Invent your own drills and exercises to keep things interesting and maximize your glove’s break-in time.
ii. Playing Catch with a Friend:
One of the most enjoyable ways to break in your glove is by playing catch with a friend. The back-and-forth throws loosen the leather, mold the pocket, and help you build a comfortable fit. Plus, it’s a great way to bond with your teammate and have some fun while you’re at it.
- Realistic practice: Throwing and catching with a friend simulates real game situations, allowing you to test your glove’s performance under pressure.
- Variety of throws: A friend can throw you different types of pitches, from fastballs to curveballs, helping you develop your catching skills and adjust your glove accordingly.
- Social aspect: Playing catch with a friend adds a fun and social element to the break-in process, making it more enjoyable and motivating.
Benefits:
Tips:
- Start with short distances and gradually increase them as your glove loosens up.
- Mix up your throws, including grounders, pop-ups, and liners, to work different areas of the glove.
- Communicate with your friend and let them know which areas of the glove need more attention.
Remember:
Regular use and playing catch are not just efficient ways to break in your glove, they’re essential for developing your skills and building confidence on the field. So, grab your glove, find a friend, and get ready to turn your stiff new companion into a well-worn, trusty ally!
6. Tips for Quick Break In
i. Wearing the Glove Around the House:
This might sound unconventional, but turning your house into a makeshift training ground can be surprisingly effective. Wear your gloves while doing chores, watching TV, or even eating (just be careful!). The constant contact and gentle pressure help soften the leather and mold it to the shape of your hand.
Benefits:
- Passive break-in: This method requires minimal effort and can be easily incorporated into your daily routine.
- Improves comfort: Wearing the glove around the house helps you get used to its feel and weight, building a sense of familiarity that translates to better control on the field.
- Targeted shaping: You can focus on specific areas, like the palm or pinky finger stall, by holding items like a rolled-up sock or small ball while wearing the glove.
Tips:
- Don’t overdo it! Wearing the glove for extended periods can be uncomfortable. Take breaks and avoid over-tightening the laces.
- Choose light activities: Stick to household tasks or light exercises to avoid putting strain on the leather.
- Clean your glove regularly: Constant contact with your skin can transfer dirt and oils, so be sure to wipe it down with a damp cloth after use.
ii. Flexing and Squeezing Exercises:
Similar to wearing the glove around the house, dedicated flexing and squeezing exercises can accelerate the break-in process. Gently open and close the glove multiple times, focusing on different areas like the palm, fingers, and pocket. You can also squeeze a baseball or rolled-up sock inside the glove while performing these exercises.
Benefits:
- Targeted conditioning: You can focus on specific areas that need more break-in, like a stiff pocket or tight finger stalls.
- Increased flexibility: These exercises help loosen the leather and make the glove more flexible for catching different types of throws.
- Faster results: Dedicated exercises can expedite the break-in process compared to passive methods like playing catch.
Tips:
- Don’t force it! Be gentle and avoid using excessive force, as this can damage the leather or stitching.
- Start slow and gradually increase the intensity and duration of your exercises as the glove loosens up.
- Listen to your glove: If you feel any pain or discomfort, stop the exercises and take a break.
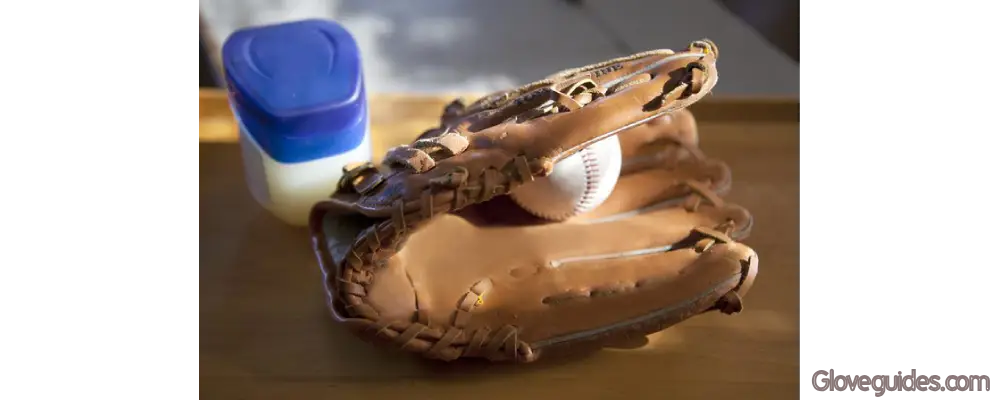
iii. Storing the Glove with a Ball Inside:
Keeping a baseball or rolled-up sock inside the pocket while storing your glove helps maintain its shape and prevent it from drying out. This can be especially helpful in dry climates or during off-season storage.
Benefits:
- Preserves shape: The ball helps maintain the depth and form of the pocket, preventing it from flattening over time.
- Prevents drying: The ball absorbs moisture from the air, keeping the leather supple and less prone to cracking.
- Ready to play: Having a ball already in the glove saves you time during practice or games, as you won’t need to break it in from scratch each time.
Tips:
- Use a baseball or a tightly rolled-up sock that snugly fits the pocket without overstretching it.
- Don’t over tighten the laces: Leave some room for the ball to move and breathe.
- Store the glove in a cool, dry place: Avoid exposure to direct sunlight or excessive heat, as this can dry out the leather.
Remember, these quick break-in tips are meant to complement traditional methods like playing catch and using a mallet. Don’t rely solely on them, as they might not be suitable for all types of gloves or playing styles.
7. Maintenance and Care: Preserving Your Glove
Breaking in your glove is just the first step. To ensure it remains a reliable partner throughout your baseball career, proper maintenance is crucial. Here are three key practices to keep your glove in top shape:
i. Regular Cleaning Routine:
Just like your cleats and bat, your glove needs regular cleaning to remove dirt, sweat, and grime that can build up and affect its performance. Here’s how to do it right:
- Soft touch: Use a soft, damp cloth to wipe down the glove after every use. Avoid harsh chemicals or detergents, which can damage the leather.
- Focus on the pocket: Pay special attention to the pocket, as this area sees the most action and can trap dirt easily. Gently massage the leather with your fingers to loosen any buildup.
- Air it out: After cleaning, let the glove air dry completely in a cool, shaded area. Avoid direct sunlight or heat, which can dry out the leather.
- Deep cleaning (optional): For deeper cleaning, you can use a specialized leather cleaner designed for baseball gloves. Follow the manufacturer’s instructions carefully and avoid over-cleaning.
ii. Storing the Glove Properly:
When you’re not playing, how you store your glove can significantly impact its lifespan. Here are some tips:
- Shape it up: Before storing, pack the pocket with a baseball or rolled-up sock to maintain its shape.
- Keep it upright: Avoid storing your glove flat, as this can cause the leather to crease and lose its form. Stand it up on a shelf or hang it from a hook using a glove hanger.
- Cool and dry: Choose a cool, dry place to store your glove. Avoid damp areas or extreme heat, which can damage the leather and attract mold.
- Keep it company: If you have multiple gloves, store them together to help them retain their shape and prevent the leather from drying out.
iii. Periodic Conditioning to Maintain Suppleness:
Over time, even with proper care, leather can dry out and become stiff. To prevent this and maintain the suppleness of your glove, consider using a leather conditioner specifically designed for baseball gloves. Here’s how:
- Less is more: A little goes a long way! Apply a small amount of conditioner to a clean cloth and gently rub it into the leather, focusing on areas like the pocket and palm.
- Timing is key: Don’t over-condition your glove. Once every few months is usually enough, depending on the weather and your usage frequency.
- Natural is best: Avoid using harsh chemicals or oils on your glove. Stick to natural conditioners made with lanolin or beeswax to keep the leather healthy.
Remember: Consistent cleaning, proper storage, and periodic conditioning are the cornerstones of a long-lasting, well-performing glove. By incorporating these simple steps into your routine, you can ensure your trusty ally remains game-ready for years to come.
8. The Wrong Way to Break in a Baseball Glove
Sometimes, the best way to learn is by knowing what not to do. When it comes to breaking in your baseball glove, good intentions can lead to disastrous results if you’re not careful. So, before you unleash your inner MacGyver on your new leather friend, let’s explore some common pitfalls to avoid:
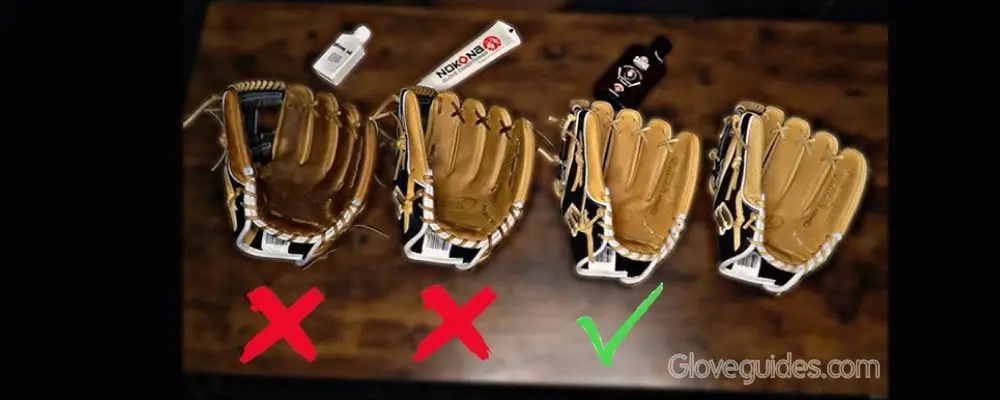
1. Don’t: Microwave or Bake It:
While the idea of a quick heat treatment might be tempting, think twice before turning your oven into a glove-cooking station. Microwaves and ovens can dry out and damage the leather, leaving you with a brittle, cracked mess. Remember, your glove is not a pizza!
2. Don’t: Leave Your Glove in the Car:
Extreme temperatures are the enemy of leather. Leaving your glove in the scorching heat of a parked car is a recipe for disaster. The intense heat can dry out the leather, shrink the glove, and even weaken the stitching. Find a cool, shady spot for your glove, far from the sun’s wrath.
3. Don’t: Excessive Shaving Cream:
This surprising household item might seem like a quick fix, but its softening properties can be detrimental to your glove’s grip. Shaving cream can make the leather slippery and affect your ability to catch. Stick to natural methods like warm water and leather conditioner for safe and effective break-in.
4. Don’t: Put Your Glove Under a Mattress:
While the weight might seem like a good way to shape the pocket, placing your glove under a mattress can create uneven pressure and damage the leather. Think of your glove as a delicate flower, not a doorstop. Treat it with care and avoid subjecting it to crushing force.
Remember: Taking the time to break in your glove properly will pay off in the long run. By avoiding these common missteps and sticking to tried-and-tested methods, you can enjoy your glove for years to come.
How to Break in a Baseball Glove Properly – Conclusion
Breaking in a baseball glove is a journey, not a race. It’s about building a bond with your leather companion, one throw, one catch at a time. Resist the urge for quick fixes and embrace the gradual process. With patience and dedication, you’ll witness your glove transform from a stiff newcomer into a snug, reliable partner, an extension of your skills and confidence on the field.
Remember, every scuff and crease tells a story, a testament to countless throws snagged, plays made, and memories etched in leather. So, grab your glove, embrace the journey, and let the game shape you both. The diamond awaits, and your perfect glove is waiting to be shaped by you.
FAQs
Q: How do you soften old baseball gloves?
Regular use, leather conditioner, and light mallet shaping can help soften them up. Avoid harsh chemicals and extreme heat. Brief exposure to indirect sunlight can soften leather, but avoid prolonged exposure that can damage it.
Q: How do you break in a glove fast?
Play catch regularly, use a break-in ball, consider professional machine services (check safety and cost). Avoid forceful methods or overheating. Fast break in methods like microwaving can damage your glove. Patience and consistent use are key!
Q: Should you wet a baseball glove to break it in?
Wetting can slightly soften leather, but avoid soaking. Use warm water and let it air dry naturally.